


Note: there is an update relating to InVision Studio at the bottom of this article. You can also view InVision’s help article on finding you public share link.
If you design digital products like websites or apps then you will be well aware of the powerhouse prototyping tool InVision. They’ve been taking the design world by storm since founded in 2011.
Designing prototypes is an important part of any designer’s workflow, as such, InVision has become an integral tool within product teams. However, designing the prototype is only half the job, the second part is testing the design with users and seeing if what you’ve designed works.
Like a number of prototyping tools on the market, InVision has some usability testing baked in. It predominantly revolves around getting videos of users while they test a prototype on their iPhone 6 or above.
These videos of course are valuable, however, there is so much more that can be done with user testing and for these situations a tool like Loop11 is perfect.
The good news is, using Loop11 to test your InVision prototypes couldn’t be easier. Below we detail the steps.
When creating a Loop11 test you have two options. You can either insert JavaScript into your website/prototype, or you can choose to use the no-code user testing alternative:
No-Code Option
This option is really simple. Get your ‘share link’ from InVision.
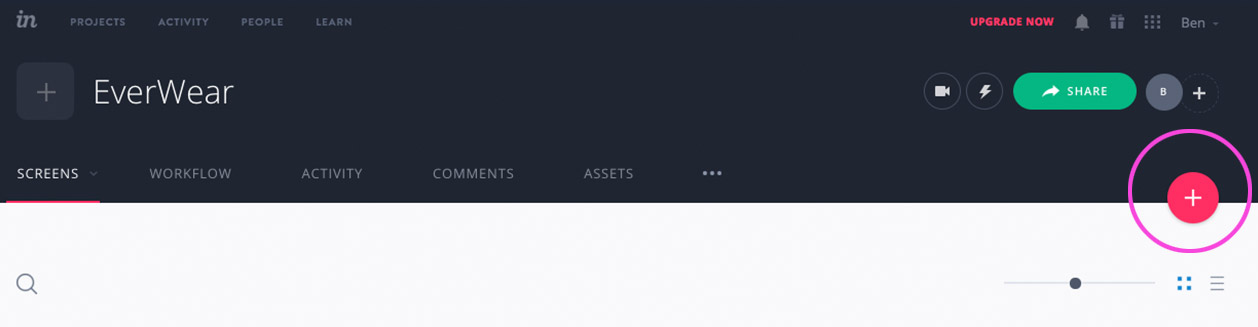
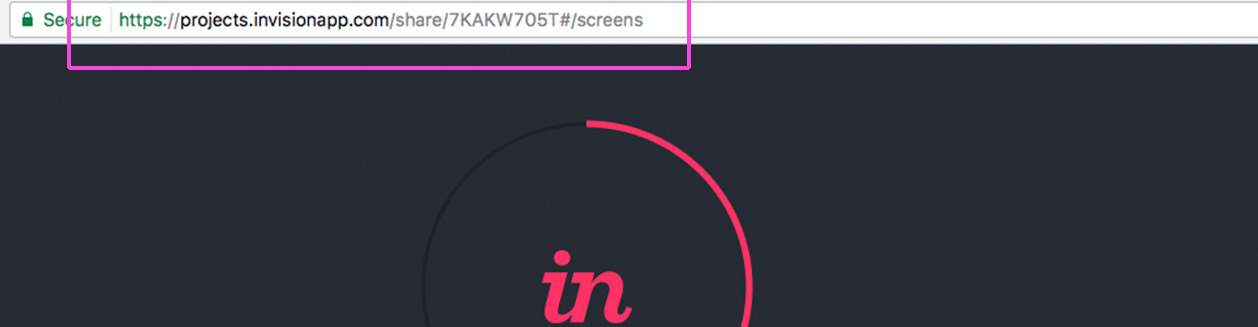
Then load the URL in your browser, navigate to where you wish to start the Loop11 test. Then when setting up your test all you need to do is copy and paste the URL from the prototype into the ‘task start’ URL field within Loop11. Be sure not to use your ‘share link’ as the start URL in Loop11. Instead use the link that the ‘share link’ redirects you to. An example of the correct link is highlight below.
JavaScript Option
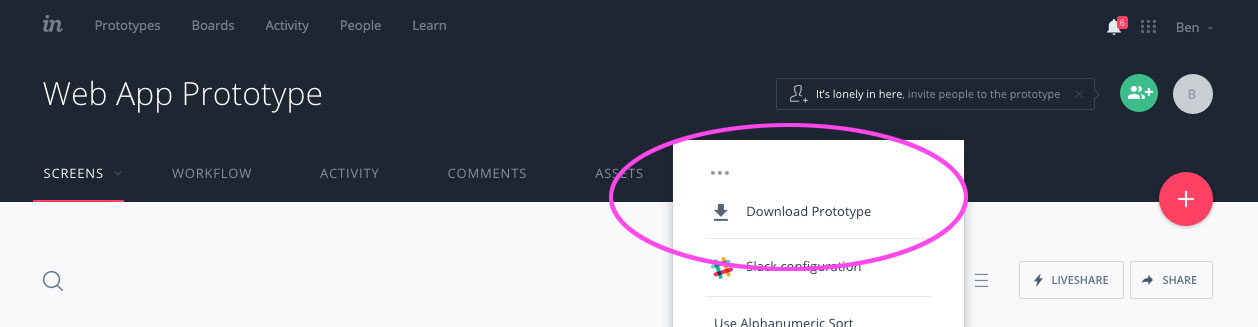
Step 1
Login to your InVision account, navigate to your prototype, then click on the menu item consisting of three dots (…). A secondary menu will then appear from which you can select ‘Download Prototype.
Step 2
Ensure that ‘ZIP’ is selected as the file type and then click ‘Generate Zip’.

Step 3
Once the ZIP file is ready, you will be provided with a download link. This saves the zip file to your computer.

Step 4
Once you have downloaded the ZIP file, saved it in your preferred location, and unzipped the file, you then need to add the Loop11 JavaScript (JS). To find the JS login to your Loop11 account and navigate to ‘My Account’. Here you will see the standard JS. Select the JS lines and copy them, then going back within your downloaded InVision folder, open the file called ‘index.html’. You can use any text editor to open the file as well as popular tools such as Dreamweaver.
If you’ve opened ‘index.html’ correct then you’ll see a lot of code, don’t worry, you don’t need to read or understand it. Scroll to the very bottom of the file and paste the Loop11 JS code just before the closing BODY tag and save the file. In the below screenshot we’ve circled the closing BODY tag in pink and highlighted the Loop11 JS in green.

Step 5
The last step is to upload the unzipped InVision folder to your websites or server. You’re then ready to start configuring and running your Loop11 test on your InVision prototype.
InVision Studio
If you use the ‘share to Invision’ button within InVision Studio it will provide you with a link, however, this is not the final link you want to use for your Loop11 project. This link actually requires the viewer to login to your InVision account.
So what you need to do is first grab this link and visit it in your browser. Then, once you see the prototype, locate the ‘Share’ button and click on it, the button looks like this:
![]()
![]()
Then, once you click on it you will be given an alternate link to share with anybody. It’ll look like this:
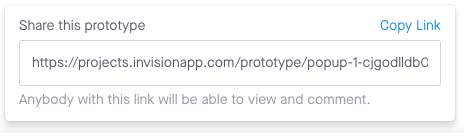
You can copy this link and use it as you start URL for your Loop11 project.
- Introducing Loop11’s Tester Panel - March 24, 2020
- Our Response to the Coronavirus - March 17, 2020
- Release Notes: 5 Second & First Click Tests, Image Testing& More… - October 17, 2018
![]()
![]() Give feedback about this article
Give feedback about this article
Were sorry to hear about that, give us a chance to improve.